

Use a saturated-salt single-point check for a fast field verification, and reserve multi-point calibration in a humidity chamber against a chilled-mirror hygrometer for anything requiring traceable, ISO/IEC 17025 accredited results. The salt method corrects offset in an afternoon. The chamber method corrects both offset and span, and it produces a certificate that stands up to audit.
Your choice comes down to what "accurate" needs to mean for your process. High-quality digital RH sensors drift at roughly 0.19% to 0.25% RH per year, which is why calibration frequency isn't a formality. It's a direct response to a known, published decay curve.
The basic workflow never changes, whether you're using a jar of salt or a NIST-traceable generator:
Reliable humidity sensor calibration depends on matching the method (salt jar, chamber, or chilled-mirror reference) to how traceable your results actually need to be.
| Point | Details |
|---|---|
| Match method to need | Use saturated-salt for quick field offset checks; use chamber or chilled-mirror methods for traceable, multi-point results. |
| Respect equilibration time | Salt jars need 12 to 24 hours to stabilize before a reading means anything. |
| Test the full range | Run ascending and descending loops with roughly 40 minute dwell times to catch hysteresis. |
| Budget for drift | Digital RH sensors drift about 0.19% to 0.25 %RH per year, which should set your recalibration schedule. |
| Use accredited service when it counts | Pcsprecision provides NATA and ISO/IEC 17025 aligned calibration with digital certificates for audit-ready traceability. |
The saturated-salt method turns a mason jar into a one-point reference standard. It's cheap, it's portable, and it follows the same principle used in ASTM E104: a saturated salt solution in a sealed container generates a fixed, predictable relative humidity as long as temperature stays stable.
Here's the procedure:
Different salts give you different target points. Sodium chloride (NaCl) settles near 75.6% RH at 15°C. Potassium carbonate (K2CO3) sits much lower, around the mid-40s. Potassium chloride (KCl) lands in the mid-80s, and lithium chloride (LiCl) gives you a low-humidity anchor near 11%. Every one of these values shifts slightly with temperature, so match your salt's published table to the actual jar temperature rather than assuming room temperature is close enough.
Pro Tip: Run two jars in parallel, one low RH salt and one high RH salt, so you get a two-point check instead of a single anchor. It won't give you a full calibration curve, but it catches slope errors that a single point can't see.
The salt method has a hard ceiling. It corrects offset at one humidity level, nothing more. It says nothing about how the sensor behaves across its full range, and it isn't traceable on its own unless you chain it to a transfer standard that itself was calibrated against a certified reference.
Multi-point calibration exists because a single offset correction assumes the sensor's error is constant across its whole range, and that assumption rarely holds. A humidity chamber or generator, checked against a chilled-mirror hygrometer, lets you correct both offset and slope simultaneously.
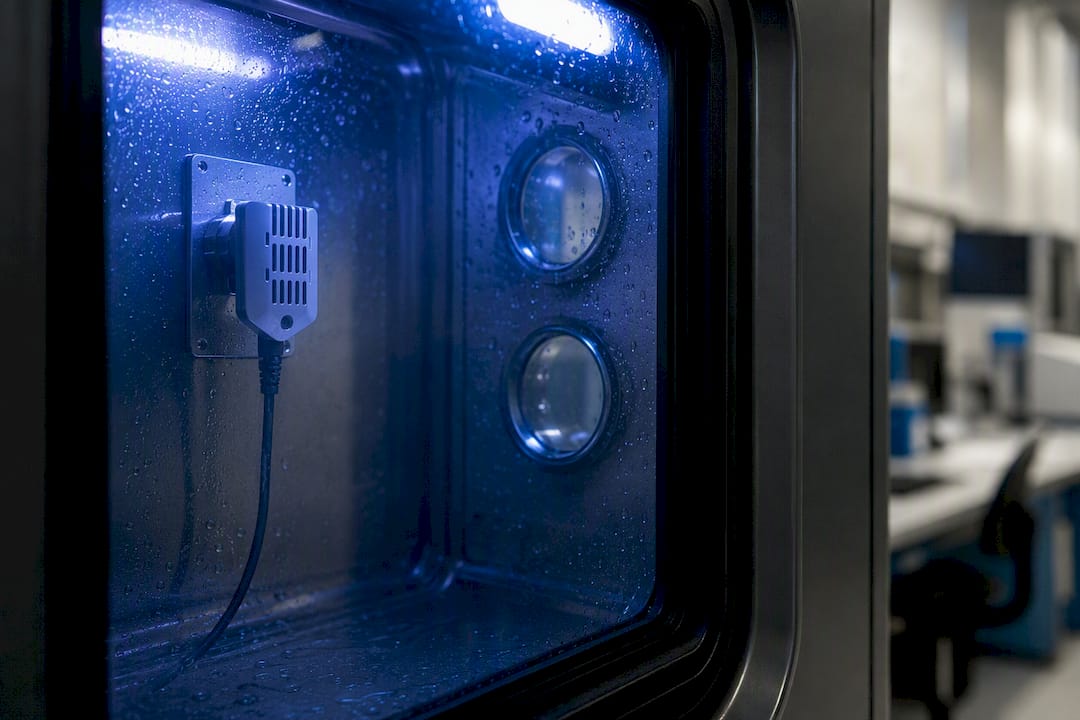
A chilled-mirror hygrometer works by cooling a mirror surface until dew or frost just begins to form, then measuring that exact temperature. Dew point is a direct physical measurement, not an inferred one, which is why chilled-mirror instruments serve as the reference of choice in accredited labs. NIST's own Hybrid Humidity Generator produces dew and frost points across a range of negative 90°C to positive 85°C, with relative humidity uncertainty below 0.3% (k=2) across many operating conditions. That is the backbone of the traceability chain everything else in your lab ultimately connects back to.
Commercial humidity generators work on a related principle, mixing precisely controlled wet and dry air streams (or using two-pressure/two-temperature methods) to produce a known, stable RH setpoint on demand.
| Method | Accuracy achievable | Equipment required | Number of points | Time to complete | Best for |
|---|---|---|---|---|---|
| Saturated-salt jar | Moderate (offset only) | Low cost, salts and jars | Single point (or 2 in parallel) | 12 to 24 hours equilibration | Quick field verification |
| Humidity chamber + reference | High | Moderate to high cost | 3 to 5 points typical | Hours per full run | Lab or workshop verification |
| Chilled-mirror + generator | Very high, traceable | High cost, specialized | 3 to 7 points | Half day to full day | Metrology lab, accredited calibration |
Chaining back through primary and secondary calibration methods is what turns a calibration into a traceable one. Accredited labs typically use secondary references, stable chilled-mirror instruments checked periodically against primary standards. Running a full primary generator for every job is impractical.
Pro Tip: If your process runs mostly between 40% and 60% RH, don't waste chamber time chasing 10% and 95% points. Cluster your setpoints around the range you actually operate in and add one point at each extreme just to catch gross nonlinearity.
Most calibration failures aren't sensor failures. They're setup failures. A sensor that reads 4% RH high in the chamber often isn't defective; it's sitting three inches from a warm circuit board, or it's been exposed to a contaminated sinter filter for months.
Before you start any run, work through this checklist:
Pro Tip: If a sensor reads a slow, gradual drift downward for hours after removal from a high-humidity environment, that's not a fault. It's the temporary offset behavior documented in Sensirion's SHT25 datasheet after exposure above 80% RH. Give it time to recover before you condemn the part.
If a sensor's readings drift erratically, stick at one value regardless of chamber changes, or respond sluggishly after high-humidity exposure, suspect contamination or condensation on the sensing element before you suspect the electronics.
A calibration that only checks one static point tells you nothing about how the sensor behaves in motion, and most real-world environments are constantly moving.
Run an ascending then descending profile: 15% → 30% → 50% → 70% → 90%, then back down through the same points. Hold each setpoint for roughly 40 minutes, extending the dwell time at your first point since the chamber itself needs longer to reach full thermal stability. Sensirion recommends this loop structure specifically because the gap between the ascending and descending readings at the same nominal RH reveals hysteresis, an error mode a single-direction sweep will never catch.
Repeatability shows up as the spread between repeated visits to the same setpoint across a full test run. Anything wider suggests contamination, a failing element, or a setup problem worth chasing down before you trust the unit's other data.
Raw deviation numbers are only useful once you convert them into a correction you can actually apply. That means fitting a model to your data points and validating it before you trust it in the field.
Project work using low-cost sensors like the HIH6030 and DHT-22 shows that a well-chosen polynomial fit against a handful of saturated-salt reference points can meaningfully cut RMSE. That's a useful benchmark for a workshop calibration exercise, but treat the specific error reduction as illustrative rather than something to promise a client.
Statistic Callout: Digital RH sensors from major manufacturers commonly drift 0.19% to 0.25 %RH per year even when built to a high accuracy class. A calibration performed today has a shelf life, not a permanent guarantee.
Apply the correction where it makes the most operational sense: as a nonvolatile offset written into sensor firmware for standalone devices, or as a filter applied at the gateway or server level when you're managing a fleet of loggers that need centralized version control.
Field calibration answers "is this sensor close enough for today's process?" An accredited lab answers "can I prove this measurement to an auditor, a regulator, or a customer?" Those are different questions, and conflating them is where a lot of technicians get into trouble.
Your uncertainty budget has to account for more than the reference's stated accuracy. Reference uncertainty, temperature nonuniformity within the chamber, sensor repeatability, and airflow or pressure effects on gas-loop dew point systems all stack together into the final number you can defend.
Statistic Callout: With drift running 0.19% to 0.25 %RH annually, a sensor left uncalibrated for two or three years can accumulate close to a full percentage point of unaddressed error, on top of any contamination-driven drift.
Sensor exposure history matters as much as the calendar. A unit that's spent months in a high-contamination or condensing environment needs checking sooner than one sitting in a clean, dry control room, regardless of what the interval schedule says. An ISO/IEC 17025 accredited lab will issue a certificate that states the measured points, the associated uncertainty, and traceability back through a documented chain, exactly the kind of paper trail an auditor expects to see. Pcsprecision's guide to NATA calibration standards breaks down what that accreditation actually covers.
Have this on hand before you open a single jar or power on a chamber:
Before you start, confirm the reference's own calibration is current, remove or isolate heat-generating components near the sensing element, and extend the firmware's sampling interval for any sealed test.
We run into the same handful of mistakes over and over: technicians pulling sensors out of the jar too early, boards left inside sealed chambers radiating heat straight at the sensing element, and filters that haven't been swapped in years quietly skewing every reading low.

Our advice is consistent. Keep a dedicated transfer standard in sealed, contaminant-free storage, and don't let it double as your everyday field unit. Log every calibration, not just the failures. With more than 40 years across manufacturing, food, pharma, and aerospace, we've built our own calibration practice around NATA and ISO/IEC 17025 alignment, and it shows up in how our case work holds up under audit.
Pcsprecision gives you a path from field check to formal traceability without switching providers mid-project. Where a workshop salt-jar setup tops out at single-point offset correction, our NATA and ISO/IEC 17025 aligned calibration covers multi-point verification with full documentation, on-site or in our lab.
Our humidity and dew point calibration service includes:
If you're managing sensors across a manufacturing line, a lab, or a cold chain, our team can also help you decide the right recalibration interval for your specific process risk, covered in more depth in our piece on why regular calibration matters for industrial accuracy. Request a quote or book a calibration slot through Pcsprecision today.
How often should humidity sensors be calibrated? Critical or regulated processes typically need recalibration every 3 to 6 months, standard industrial monitoring every 6 to 12 months, and noncritical monitoring annually, based on published drift rates for digital RH sensors.
Can I calibrate a humidity sensor without lab equipment? Yes, a saturated-salt jar gives you a legitimate single-point check, but it only corrects offset. It won't catch slope errors across the sensor's full range.
What's the difference between RH sensor calibration and dew point meter calibration? RH sensor calibration typically uses saturated salts or humidity chambers referenced to a percentage scale, while dew point sensor calibration usually involves a chilled-mirror hygrometer measuring the actual condensation temperature, a more direct physical reference.
Why do humidity sensors drift over time even without damage? The sensing polymer itself ages, and contamination from dust, oils, or chemical vapor gradually alters its response.
Do I need an ISO/IEC 17025 accredited calibration for every sensor? Not for every sensor. Accredited calibration matters most when you need to prove traceability to an auditor or regulator; internal monitoring sensors in noncritical roles can often rely on field checks between accredited services.
