

Infrared thermometer calibration confirms that a device’s readout matches a traceable reference source within a stated uncertainty, and it documents that match on a certificate you can defend in an audit. For the lowest uncertainty, we recommend a radiometric transfer method aligned with ASTM E2847, the primary test method for wideband handheld IR thermometers. For routine verification between full calibrations, a field check against an ice bath or contact probe gets you a fast sanity read, though not a traceable result.
Choose full laboratory calibration when your process, audit, or regulatory framework demands documented traceability and a numeric uncertainty statement. Choose a field check when you need a quick confidence read on a unit that was already calibrated and you’re watching for drift between service intervals.
A calibration only counts as complete when it delivers:
Pro Tip: If you’re deciding between a lab calibration and a field check, ask what happens if the reading is wrong. If the answer involves a recalled batch, a failed audit, or a patient safety issue, skip the field check and go straight to a traceable calibration.
Traceable infrared thermometer calibration requires a radiometric comparison against a stable reference, a calculated uncertainty statement, and a certificate documenting pass or fail against your tolerance.
| Point | Details |
|---|---|
| Match method to risk | Use full radiometric calibration for audits and compliance; use field checks only for routine drift monitoring. |
| Follow ASTM E2847 | This standard sets the procedure, uncertainty calculation, and reporting elements for wideband IR thermometer calibration. |
| Control the environment | Acclimate the device 15 to 30 minutes, avoid drafts and reflections, and keep source diameter at least 3x the field-of-view diameter. |
| Demand a complete certificate | Accept only certificates listing source temperatures, DUT readings, expanded uncertainty, distance, emissivity, and traceability. |
| Work with an accredited lab | Pcsprecision provides NATA and ISO/IEC 17025 accredited calibration with on-site options and full uncertainty reporting. |
Three terms get used interchangeably in the field, and that sloppiness causes real problems. Verification is a quick pass/fail comparison against a known reference, with no adjustment and often no formal uncertainty statement. Calibration is the full comparison across multiple points, documented with uncertainty and traceability, whether or not the device gets adjusted afterward. Adjustment means physically or electronically correcting the device’s output. Not every calibration includes an adjustment. Many handheld IR thermometers can’t be adjusted at all; the calibration simply documents the offset so users can apply a correction factor.
Three calibration types cover most use cases:
Trigger a new calibration after any repair, after a drop or suspected damage, on a fixed periodic schedule, or before any audit in food safety, pharmaceutical QA, or lab accreditation contexts. If you’re calibrating for cold chain monitoring, your interval should match your compliance framework, not just habit.
ASTM E2847 is the standard most calibration labs build their procedures around for wideband handheld infrared thermometers. It covers instruments used below 1000°C, and it specifies setup, measurement procedure, uncertainty calculation, and the elements a calibration report must include. It doesn’t mandate one specific apparatus. It sets consistent test procedures while leaving equipment choice flexible, provided the lab can demonstrate traceability and calculate uncertainty correctly.
Traceability means every reference used in your calibration chain links back, through an unbroken series of comparisons, to a national metrology institute. In practice, that chain runs from your working blackbody source, through a higher-level reference, up to a primary standard held by a body like NIST or NMI Australia. ISO/IEC 17025 accreditation is the mechanism that lets a third party verify that chain is intact and that the lab’s uncertainty calculations are sound.
A calibration certificate without a traceability statement and an uncertainty figure isn’t a calibration. It’s an opinion with a letterhead.
Before you accept a certificate from any lab, internal or external, check it against this list:
If any of those fields are missing, the certificate is incomplete, regardless of how official it looks.
A compliant setup starts with a stable thermal radiation source, either a cavity or flat-plate blackbody, since this is what the DUT actually measures against. You’ll also need a transfer standard, either a traceable contact probe (PRT, thermistor, or thermocouple) or a radiometric transfer standard matched to the DUT’s wavelength band, plus an ambient temperature reference, secure mounting and fixturing to eliminate hand tremor, and a distance gauge to hold a fixed, repeatable measurement distance.
Recommended additions improve repeatability without being strictly mandatory:
| Equipment Item | Minimum Specification Guidance |
|---|---|
| Blackbody source | Stability better than the DUT’s rated accuracy; diameter at least 3x the DUT’s field-of-view diameter at test distance |
| Transfer standard | Traceable calibration with uncertainty smaller than one-third of DUT tolerance |
| Distance gauge | Repeatable to within a few millimeters at typical calibration distances |
| Mounting fixture | Rigid enough to prevent drift during a full measurement sequence |
| Data logger (optional) | Sampling rate matched to DUT response time for averaging |
Source sizing follows a stricter rule than routine field measurement. Where a two-times spot-size rule is common for everyday spot checks, calibration demands the source diameter be at least three times the DUT’s field-of-view diameter at the calibration distance, reducing scatter and background radiation errors that would otherwise inflate your uncertainty.
Pro Tip: If you’re using a contact thermometer as a transfer standard for food-industry field checks, a compact reference like a Testo 104 folding thermometer works well, but confirm its own calibration is current before you trust it as your reference.
Environmental control accounts for more calibration errors than most technicians expect. Reflected radiation from nearby heat sources, drafts moving across the blackbody surface, and technician body heat radiating toward a low-temperature target can all shift your readings by more than the DUT’s rated tolerance.
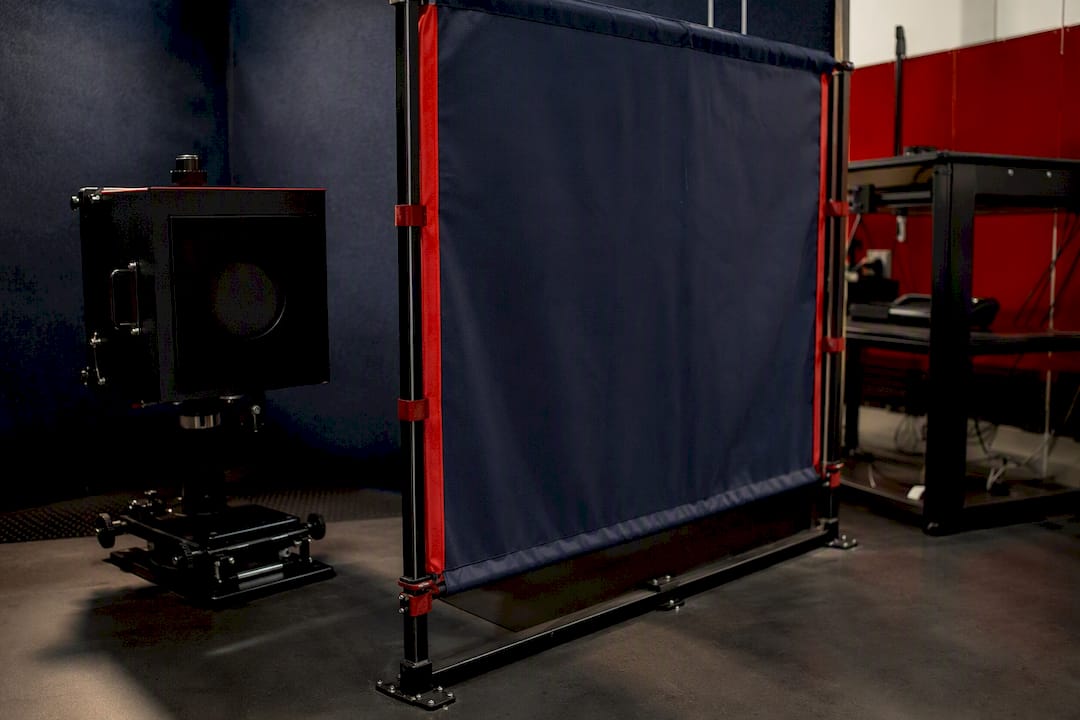
Set up in a draft-free room with stable ambient temperature, away from exterior walls, HVAC vents, and equipment that radiates heat. For low-temperature calibration points, position yourself and any bystanders away from the direct line between source and DUT. A simple partition or standing to the side rather than directly behind the instrument reduces reflected body heat significantly.
Geometry matters as much as room conditions. Set the calibration distance deliberately, center the DUT’s field of view on the source, and confirm the target diameter is several times the DUT’s field-of-view diameter at that distance, reflecting good practice for source sizing.
Before recording any reading, run through this sequence:
The FDA’s guidance on non-contact infrared thermometers reinforces this acclimation step specifically, noting that devices should sit in the test environment for 10 to 30 minutes and be used in draft-free spaces with ambient conditions roughly between 16°C and 40°C, and relative humidity below 85%. Skipping acclimation is one of the most common reasons a perfectly good thermometer appears to fail calibration.
A radiometric calibration follows a fixed sequence, and skipping steps is where most reproducibility problems start. Here’s how to run it properly.
Before touching the source, document the DUT’s identification number, model, and serial number. Record ambient temperature and humidity in the calibration room. Confirm your transfer standard’s own calibration is current and traceable. Allow the DUT to acclimate for at least 15 minutes, longer if it’s coming from a significantly different temperature environment, and let the radiation source stabilize at its first calibration point before you touch a trigger.
Choose calibration points that reflect how the device actually gets used. For most industrial or food-safety applications, three points, one near the bottom of the working range, one near the middle, and one near the top, give you a reasonable picture of linearity. A lab calibration for a wider-range clinical or process-control instrument might use four or five points. Run at least three replicate readings at each point; five is better if your process tolerance is tight.
Alignment matters more than technicians often assume. Keep the DUT within about five degrees of normal incidence to the source, since off-axis measurement introduces its own error that has nothing to do with the instrument’s actual accuracy.
For each point, calculate:
DUT Error = Average DUT Reading − Reference Source Temperature
Compare each error value against your acceptance tolerance (often derived from the manufacturer’s stated accuracy spec) and mark the point pass or fail accordingly. Note the expanded uncertainty alongside each error value; a reading that’s technically within tolerance but close to the edge, once uncertainty is factored in, deserves a closer look before you sign off.
Pro Tip: Build your measurement table as a reusable template before you start a calibration run. Chasing down the right column headers mid-procedure is how technicians end up with incomplete records that fail an audit review months later.
Field checks won’t give you a traceable certificate, but they catch gross drift fast, and they’re worth running on a routine basis between full calibrations.
| Field Method | Typical Uncertainty | Best Use |
|---|---|---|
| Ice bath | Moderate, single point only | Quick freeze-point sanity check |
| Contact-probe comparison | Higher, due to heat-exchange error | Spot-checking process temperatures |
| Portable blackbody | Lower than ice bath, higher than lab calibration | Routine drift monitoring across a range |
For food-service or field QA teams, a simple contact reference like a Testo 106 food thermometer can serve this comparison role, provided its own calibration status is tracked separately.
Every calibration result carries uncertainty, and a number without a stated uncertainty isn’t metrologically meaningful. The major contributors worth quantifying are:
| Uncertainty Source | Example Value (°C, k=1) |
|---|---|
| Transfer standard | 0.10 |
| Source stability | 0.08 |
| Emissivity setting | 0.15 |
| Size-of-source effect | 0.05 |
| Repeatability (standard deviation) | 0.12 |
Combine these using root-sum-square:
Combined uncertainty = √(0.10² + 0.08² + 0.15² + 0.05² + 0.12²) ≈ 0.23°C
Expanded uncertainty (k=2) ≈ 0.46°C
That expanded value is what appears on the certificate, and it’s what you compare against process tolerance when deciding pass or fail. Radiometric transfer tends to reduce the emissivity and heat-exchange terms compared with contact-transfer methods, since the reference and the DUT are both responding to radiative energy in the same band rather than relying on a physical contact interface that introduces its own thermal lag.
Pro Tip: If your combined uncertainty budget is dominated by the emissivity term, check whether your reference source’s emissivity is actually verified rather than assumed. A cavity blackbody rated near 0.99 emissivity is a very different reference than a painted flat plate assumed to be similar.
A usable certificate gives the end user everything they need to judge whether the device is fit for their process, without calling the lab to ask follow-up questions.
Minimum fields include the lab’s identification and accreditation number, the DUT’s identification, calibration date, environmental conditions during the test, source temperatures used at each point, corresponding DUT readouts, expanded uncertainty with stated coverage factor, measurement distance, emissivity setting, and a clear traceability statement linking the reference chain to a national metrology institute.
Compare the DUT’s calculated error against the manufacturer’s stated accuracy specification first, then against your actual process tolerance, since those two numbers aren’t always the same. A thermometer rated to ±1°C might still be unacceptable for a process with a ±0.5°C control band. Check repeatability too; a high standard deviation across replicate readings signals a noisy or failing sensor even if the average reading looks fine.
Acceptance criteria should scale with risk. A process-control application in general manufacturing might tolerate a wider margin than a food-safety cook-and-hold check, and a clinical screening application typically demands the tightest tolerance of all. Set your criteria based on what happens downstream if the reading is wrong, not on a generic industry default.
Most “broken” infrared thermometers aren’t broken at all. Run through this checklist before assuming the device needs service:
Calibrate a new instrument on purchase to establish a baseline, then follow a periodic interval based on your risk tolerance and usage intensity, commonly every six to twelve months for instruments in regular industrial use. Recalibrate immediately after any repair, drop, suspected damage, or any field check showing a result outside your acceptable margin.
Contact-transfer calibration has a structural weakness that’s easy to overlook: it introduces heat exchange between the probe and the surface being measured, and that exchange biases the reading in ways that have nothing to do with the DUT’s actual radiometric performance. Radiometric transfer avoids this because the reference source and the DUT are both responding to radiated energy in the same wavelength band, which is exactly the physical quantity the instrument is designed to measure.
Metrology experts point to heat-exchange as one of the most persistent and underestimated error sources in temperature calibration; a radiometric reference sidesteps it almost entirely, while a contact reference has to fight it at every measurement point.
ASTM E2847 remains the appropriate test method for handheld wideband infrared thermometers precisely because it’s built around this radiative comparison, with explicit expectations for uncertainty reporting rather than a bare pass/fail number.
We build every infrared thermometer calibration around traceable references and a documented uncertainty budget, not a bare pass/fail stamp. That means radiometric transfer where the application calls for it, full ISO/IEC 17025 traceability on the certificate, and either on-site service at your facility or in-house processing depending on what your operation needs.
Our accreditation history spans manufacturing, food and pharma, and laboratory environments, including work like our precision weighing case study with a hospital lab, where accuracy documentation carried real operational weight. We approach calibration as a compliance record, not a formality, because that’s how the auditors reading your certificate will treat it too.
If you’ve followed the procedure above and you’d rather hand the radiometric setup, uncertainty math, and certificate paperwork to a lab that does this daily, that’s exactly what Pcsprecision offers. We run NATA and ISO/IEC 17025 accredited calibration with full traceability, on-site service when your instruments can’t leave the floor, and 24/7 emergency support when a failed device threatens a production run or an audit deadline.
Every certificate we issue includes the uncertainty statement, source temperatures, DUT readouts, and traceability chain an auditor expects to see, not a bare pass/fail line. Turnaround depends on instrument type and current workload, but most standard calibration requests move quickly once we have your equipment details. If you’re also weighing new equipment purchases, our catalog includes measurement tools like the i-TME weighing modules that pair with a broader calibration program.
Request a quote through Pcsprecision and tell us your instrument model, working range, and the standard you need to comply with. We’ll scope the calibration from there.
How often should an infrared thermometer be calibrated? Most industrial and food-safety instruments need calibration every six to twelve months, with immediate recalibration after any repair, drop, or field check showing results outside tolerance.
Can I calibrate an infrared thermometer myself using an ice bath? An ice bath gives you a useful field check at the freezing point, but it doesn’t produce a traceable result and only verifies accuracy at that single temperature, not across your full working range.
What’s the difference between IR thermometer calibration and verification? Verification is a quick pass/fail comparison against a reference with no formal uncertainty statement; calibration is the full documented comparison across multiple points with a calculated uncertainty and traceability chain.
Why does emissivity setting matter for calibration accuracy? An incorrect emissivity setting is one of the most common causes of apparent measurement error, since the device calculates temperature based partly on the emissivity value entered, not just the raw radiation it detects.
What does ASTM E2847 require on a calibration certificate? It requires documented source temperatures, DUT readouts at each point, calculated uncertainty with a stated coverage factor, measurement distance, emissivity setting, and environmental conditions at the time of test.
